Software Engineering
:::note Table of Contents
- Architecture Overview
- Python Environment Setup
:::
Architecture overview
System is created as a set of mircroservices.
Services
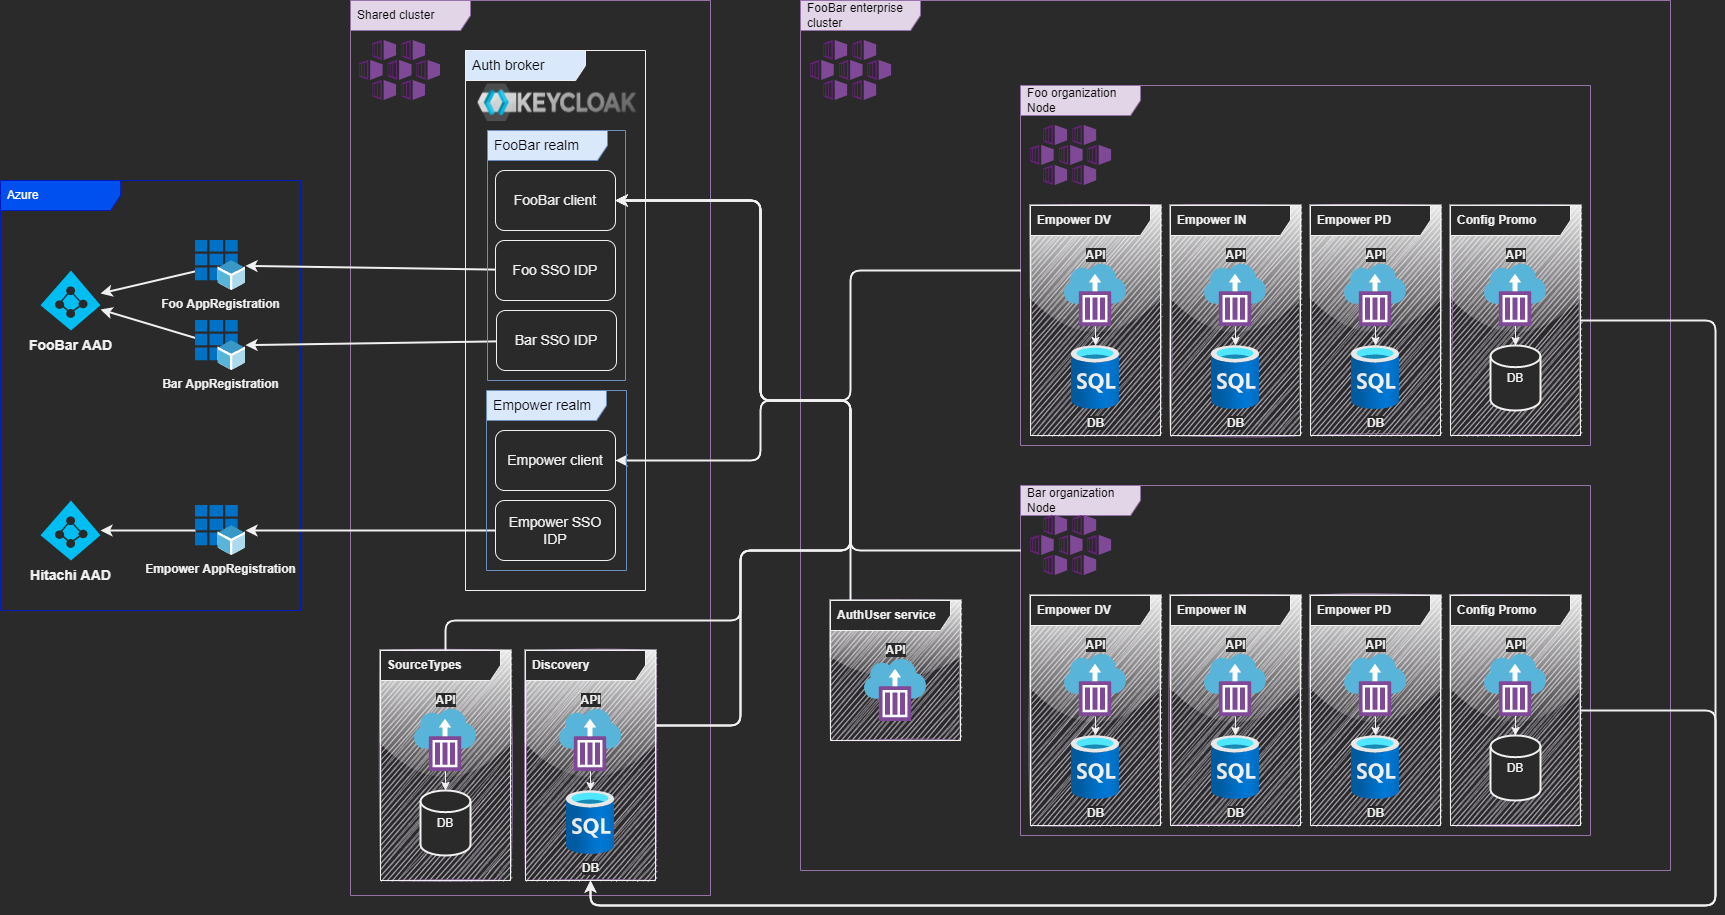
Environment list could be found here
Main services are:
empower-- main APIdiscovery-- service for connection of the services to each othersourcetypes-- service for storage and providing source typesauth-- service for users authenticationconfig promo-- service for configuration promotion between envs
Technology overview
All services are written in python.
- Azure is used as a main cloud provider.
- Azure Data Factory (ADF) is used for pipelines
- Fastapi is a main framework. Feel free to check docs.
- MS SQL Server is a main SQL database.
- Azure Cosmos DB with Mongo API is a main NoSQL database.
Local environment setup
Prerequisites
For your successful work you need such credentials:
- Hitachi email. Should be created for you.
- MS Teams access.
- Azure access (If you can see this doc you probably have one).
- GitHub account assigned to hitachisolutionsamerica org.
Assigning your github account to hitachisolutionsamerica
This process should be initiated by your manager.
It's better to register a new account like %yourname%-hs so it will be easier for the team members to assign a PR for you. But you still can use your personal account as well.
Reach out to both your manager and @<Reza Mubeen> in an email to formally request access, making sure to provide your hitachsol... email.
Once the process is initiated, you should receive a request from Power Automate in ms teams. You should reply it with your account name and this account will receive an access to the organization on Github.
Git and Environment Setup
All developers should have the following tools installed:
- Visual Studio Code [Install] (you can use other IDE if you want)
- Python 3.9 [Install]
- Git [Install]
- Poetry (for python) [See Instructions]
- PyEnv (
choco install pyenv) - SQL Server ODBC driver 17 [install](https://docs.microsoft.com/en-us/sql/connect/odbc/download-odbc-driver-for-sql-server?view=sql-server-ver15
If using VSC we highly recommend:
- Turning on settings sync
- Installing the extentions below
Recommended VSC Extentions:
If you want to use PyCharm as preferred IDE use the link provided below to get a license , add your Hitach solutions email address to allocate yourself a license from the PyCharm vault
Ask you manager to add your account to Postman application, Postman is used for API specification, and all the API contracts have to be first created on Postman before development.
Get access to Datadog application which is used for monitoring and logging, ask your manager to add your account to Datadog.
Nice to have
In order to use Docker you will have to raise an IT ticket to get a docker license , reach out to your manager to initiate and approve this request for you.
-
Docker is a good tool. Feel free to use it. Most of the services have
docker-compose.yml. -
Local SQLServer can help with development.
In order to use Lucid Chart for engineering and architectural drawing you will have to raise an IT ticket to get a Lucid Chart license, reach out to your manager to initiate and approve request for Lucid Chart license and also ask to provide access to
Empower Lucid Chart folder
Getting known with empower-backendpackages
To make development easier, useful utils are moved to empower-backendpackages repo. There are some tools to work with framework and codebase. These packages are distributed through nexus repository. Feel free to check corresponding documentation sections.
Getting the code
All services are either stored in empower repo which is a main repository or in empower-%servicename%-service repo.
Backend code is usually stored in backend folder of the repo.
Getting Secrets
Right now secrets are distributed by P2P between team members. Centralized storage is TBI. Usually you need:
- Database login/passwd
- Keycloack acces
- Keyvault access
- Cloudflare access
Running local env
Usually repositories have instructions in README.md
Creating database
Usually devs are ether use local db or create an azure database like %yourname%-test-db
To connect to azure driven database you need to setup cloudflare WARP
Running migrations
DB migrations are usually written with flyway
They are stored in ./deploy/data folder in repo.
Using docker
If you're happy enough there is a docker-compose.yml and .env.example in your repo.
Just run these commands:
cp .env.example .env- Edit .env file with your settings, especially database connection.
docker compose up
Without docker
cd backendpoetry install- Setup your environment variables
- run uvicorn like
uvicorn app.main:app --port 8000
Workflow
- Please get known with Dev Process Specs
- You can find your tasks on Azure Board
Python Environment Setup
Contents
Empower-Spark Onboarding Steps

  Technology Setup

  Python

  Git

  Pycharm

  Poetry

Code environment setup

  Cloning the repository

  Installing dependencies with poetry
Empower-Spark Onboarding Steps
Technology Setup
Python
Empower-Spark is written in Python and the current version of Python the Empower-Spark team is working with is version 3.8.10.
-
Please use the following link to reach the download page:
Python Release Python 3.8.10 | Python.org
-
Then find the installer associated with your computer’s operating system under the Files section.
Note: In this example I am using the Windows 64-bit installer, but the options selected should be very similar for Mac users.
-
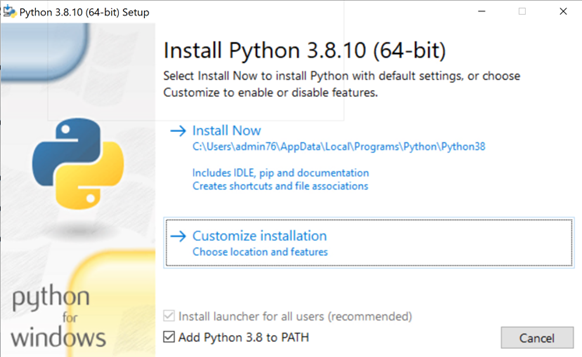
After downloading and running the installer make sure Python 3.8.10 will be added to the path and select custom install.
-
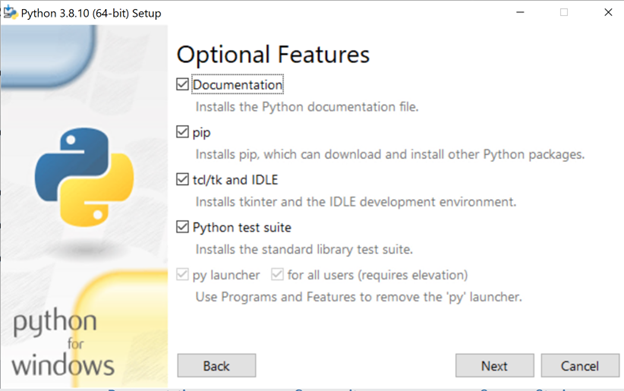
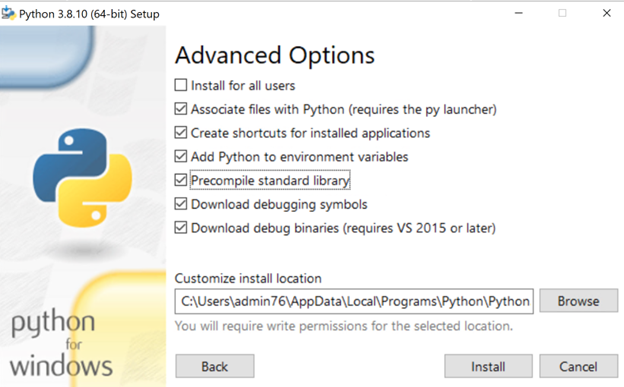
Then ensure the following options are selected in the following two panes of the installer and click install.
-
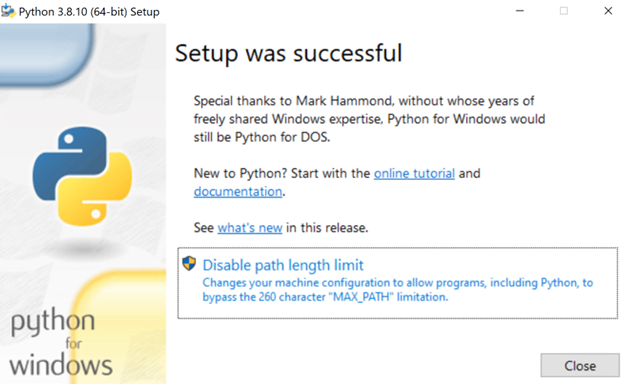
Finally, if provided the option, ensure max Path character length is removed by clicking on the “Disable path length limit” option seen in the screenshot below. If this is not shown on your machine at the end of the installation process than it has already been disabled.
-
This concludes the Python installation process.
Git
If you do not have Git installed for version control now would be a good time to do it.
-
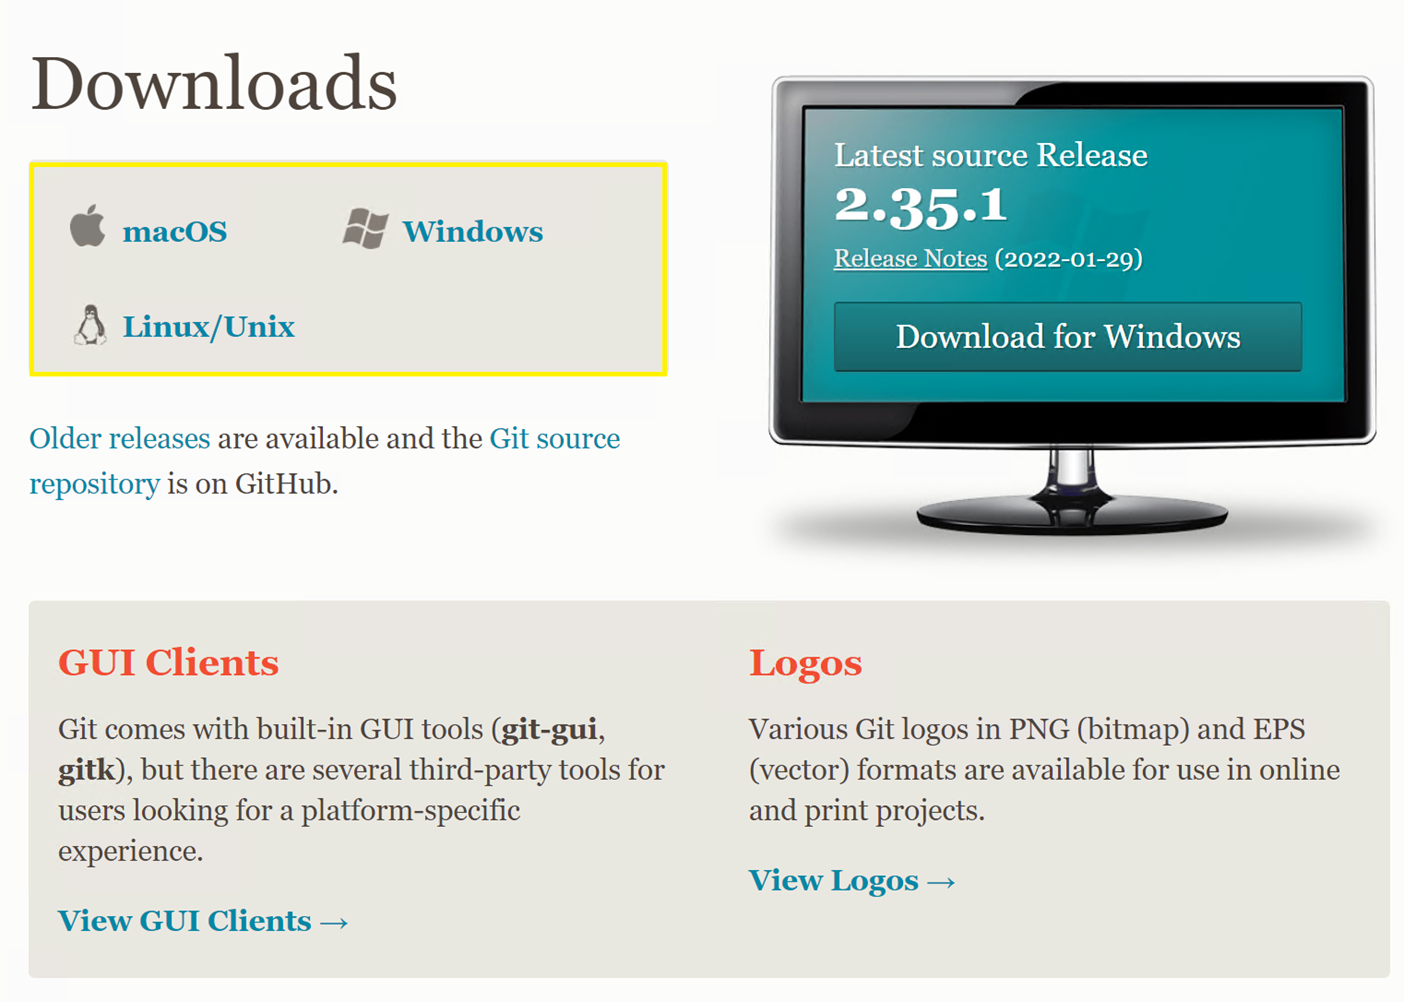
Use the following link to install Git. Git - Downloads (git-scm.com)
-
Select your operating system and the appropriate installer for your computer.
-
Unless specified, keep all values in the installer at their defaults. There are two pages worth mentioning.
-
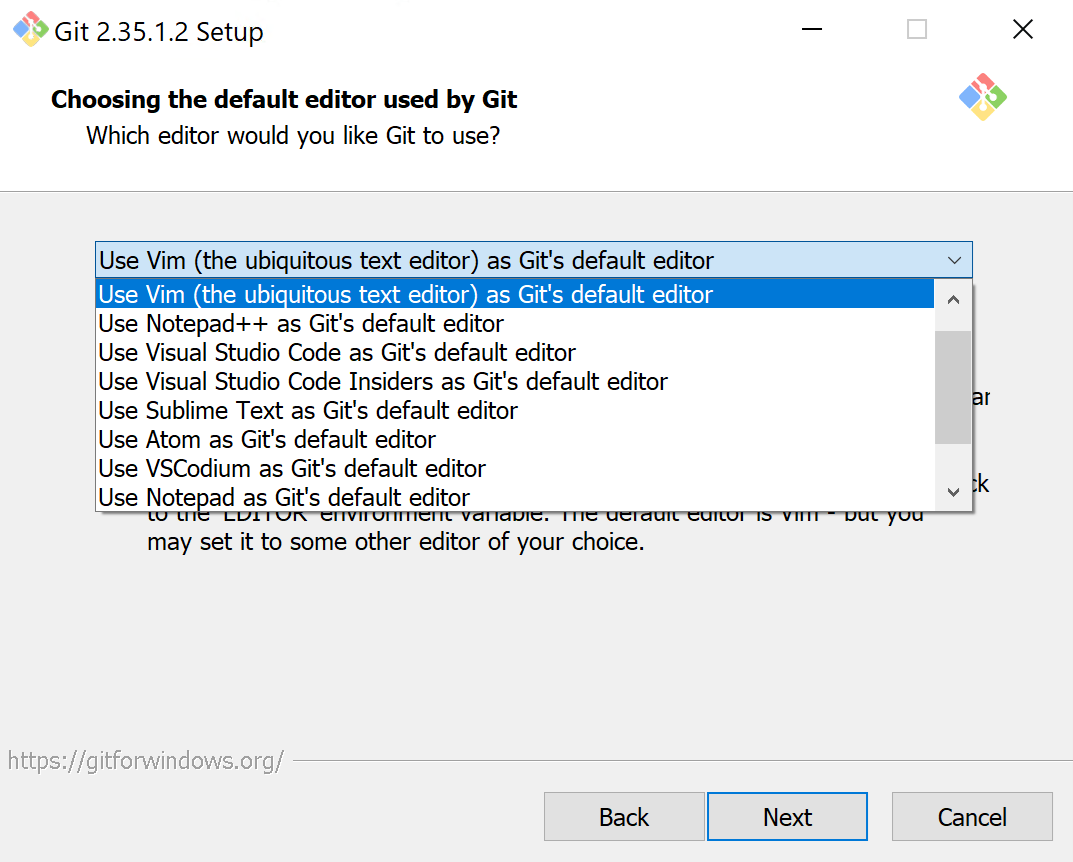
First, if you do not like Vim, you can opt to use a different text editor as the default editor for git.
-
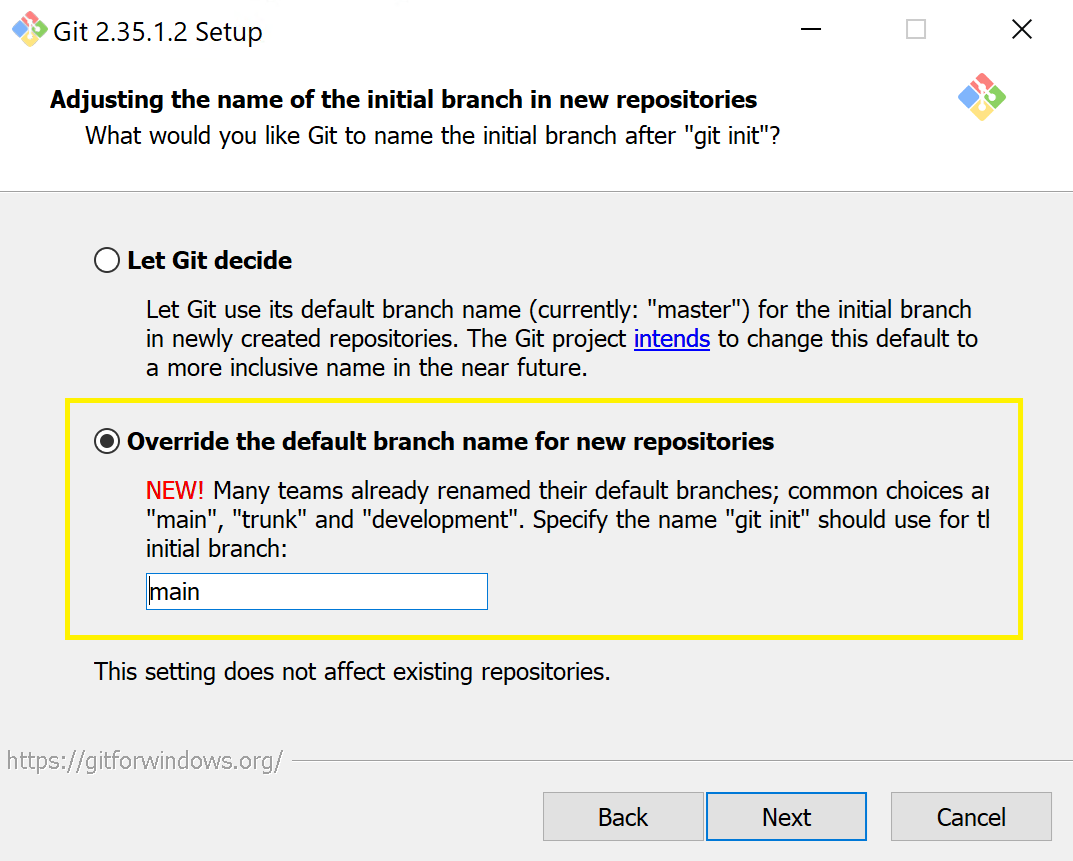
Second, we use main as the default branch name for our projects.
 This concludes the installation process for Git.
PyCharm
PyCharm is an IDE used to write Python produced by Jet Brains. It does a great job of enforcing python best practices. VS Code with Python extensions can also be used instead but PyCharm is highly recommended.
Downloading
-
The download can be found at the following link. Download PyCharm: Python IDE for Professional Developers by JetBrains
-
Make sure you select your operating system and download the community version. This version does not require a license and contains everything you need for python development.
**Note: While the pro version will allow you to connect to the SQL Server data base you are working with, this can also be done through either SQL Server Management studio or Visual Studio.
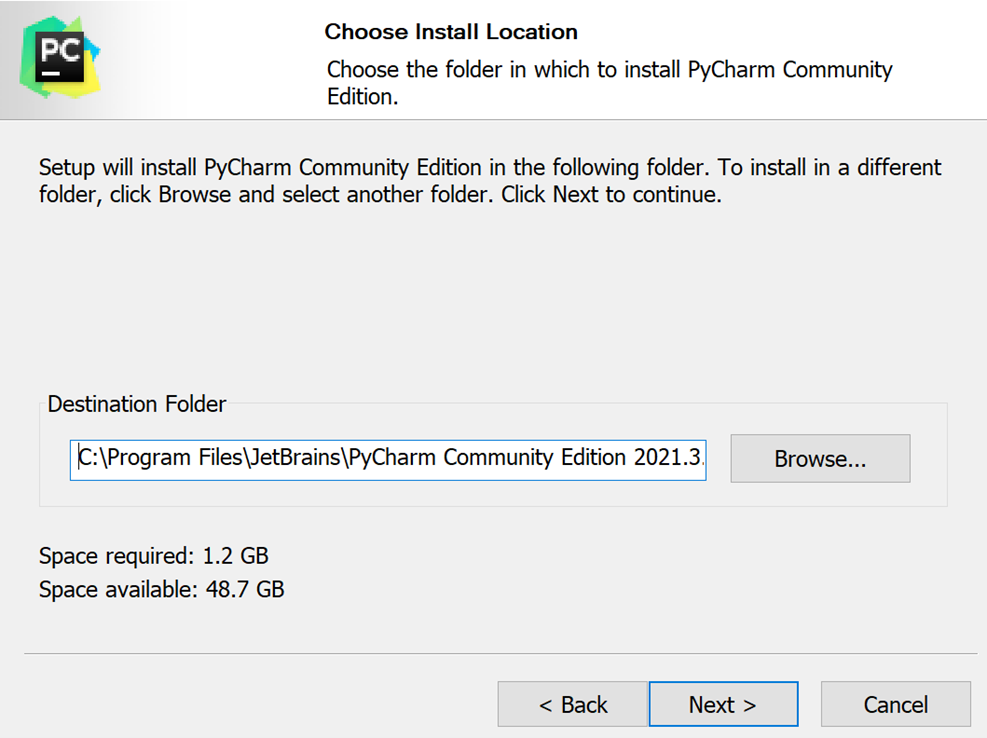
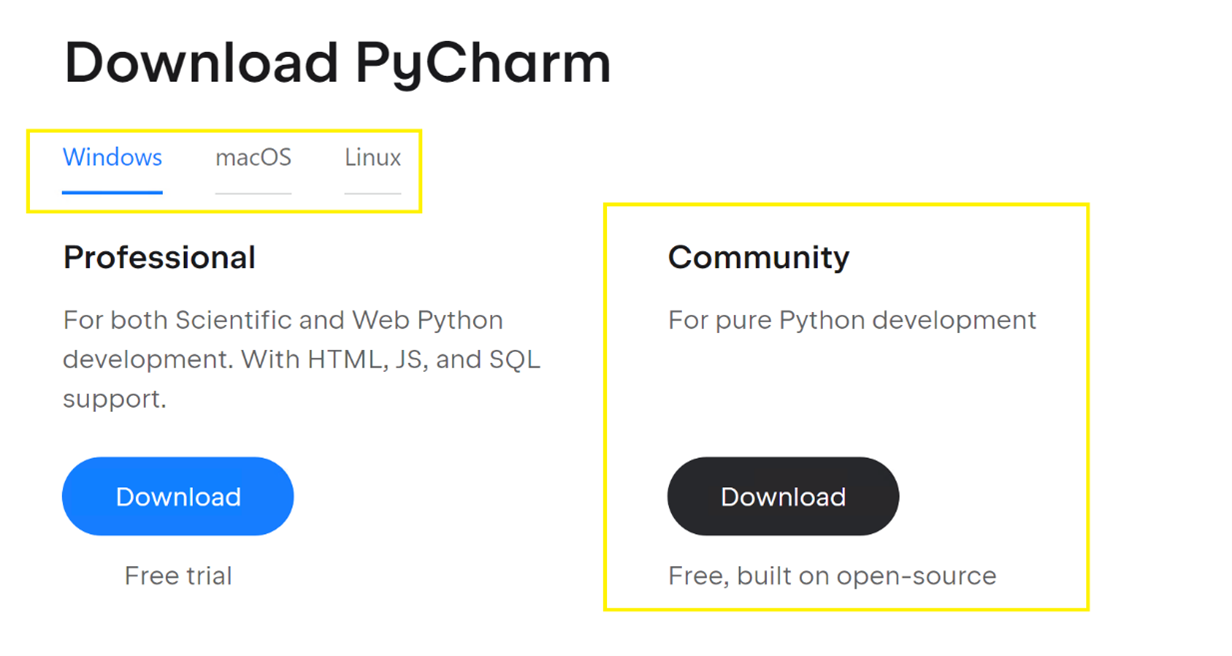 After downloading and launching the .exe file, walk through the installer. The default installation location is fine to leave as is.
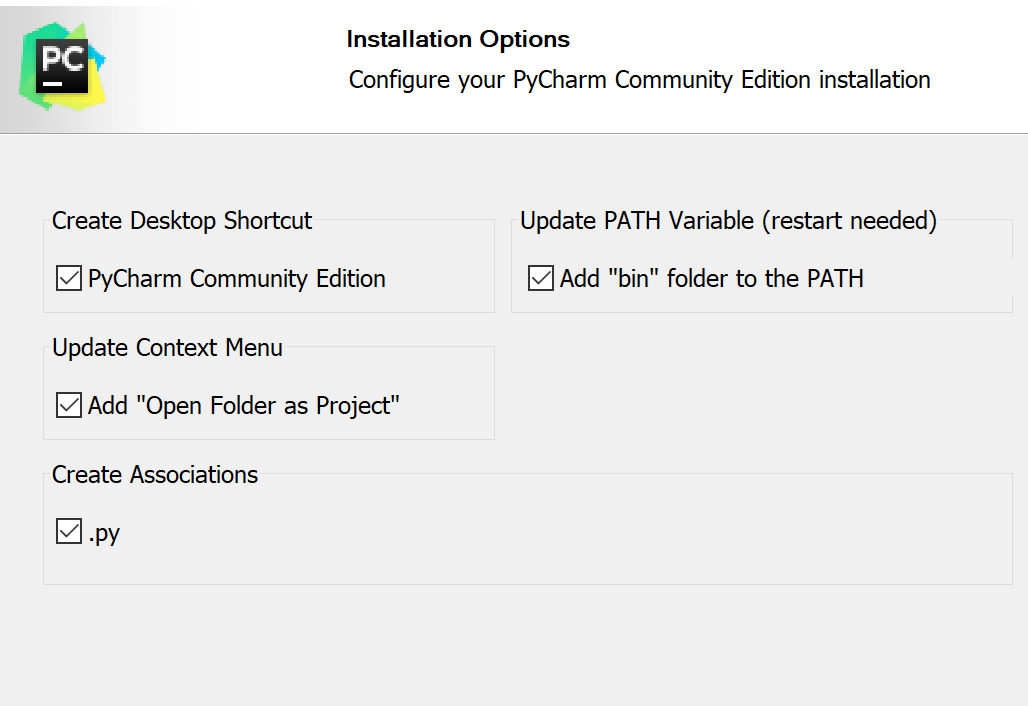
 It is recommended that you enable all installation options. Whether or not you decide to create a shortcut is up to your discretion.
 It is also fine to leave the Start Menu Folder default. From here hit install.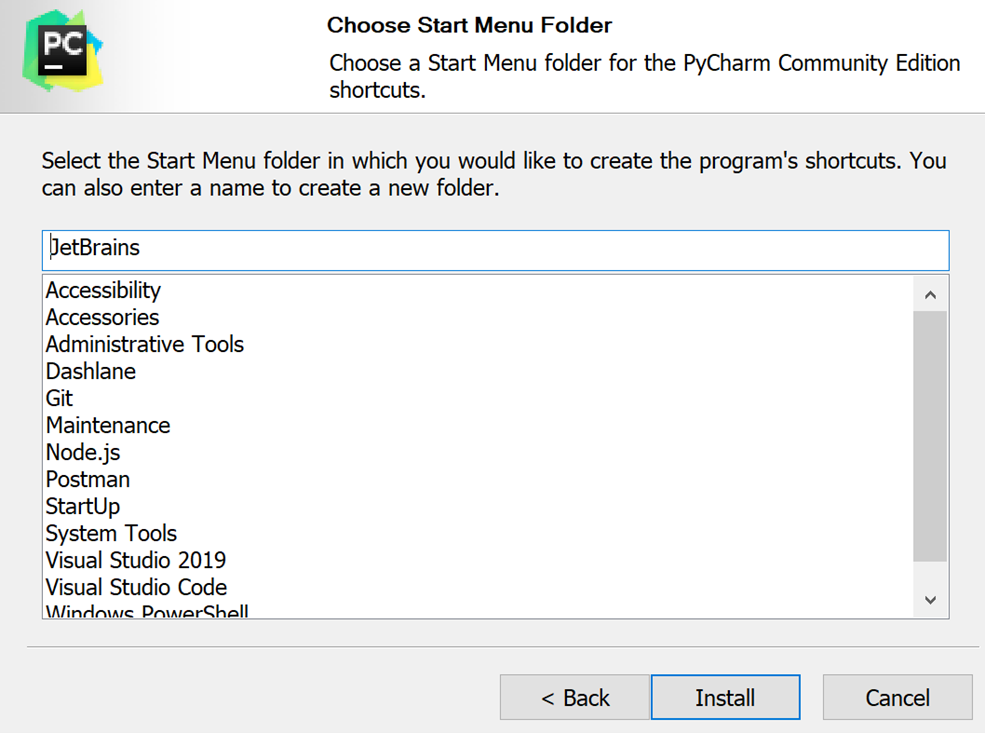
· This concludes the Pycharm installation process.
Poetry
Poetry is used by the Empower project for dependency management. This keeps library versions in sync between multiple developers.
-
The installer for poetry can be found here. Introduction | master | Documentation | Poetry - Python dependency management and packaging made easy (python-poetry.org)
-
Simply input the relevant command into the command prompt of your choice and poetry will be automatically installed.
Note: It is recommended to use the bash version of the command since this version will automatically add poetry to the path. If on windows this can be run in the program Git Bash automatically installed with Git.
-
To check poetry installed simply close your current session of the command prompt you are using and reopen it. Then type poetry –version.
Code environment setup
Cloning the repository
-
First we need to clone the empower repo
-
Navigate into the directory Users/{username}/source/repo or the equivalent directory on your operating system and run the command
git clone https://github.com/hitachisolutionsamerica/empower-spark.git.
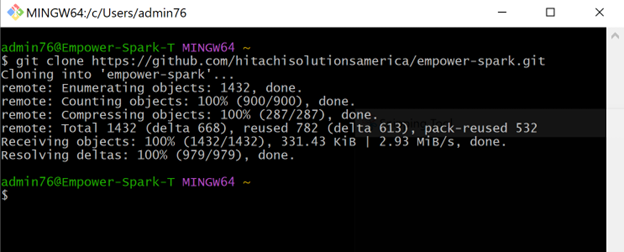
Note: If this is your first-time using git on this machine it will request your credentials. Using browser sign in is recommended.
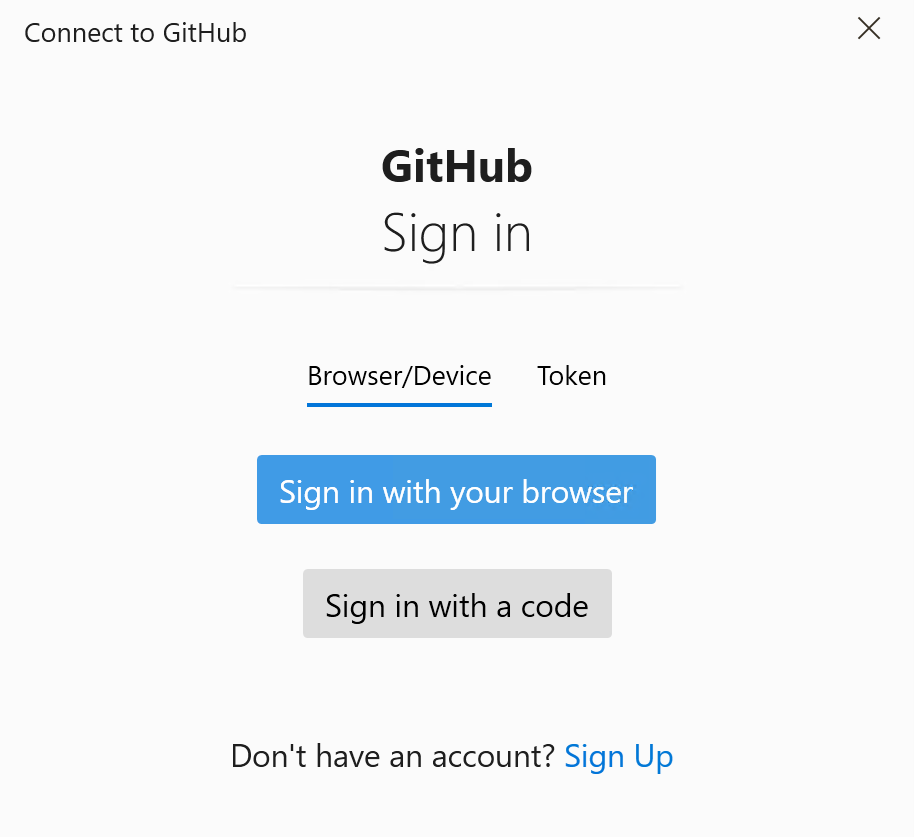
-
After logging in authorize the organization Hitachi Solutions America.
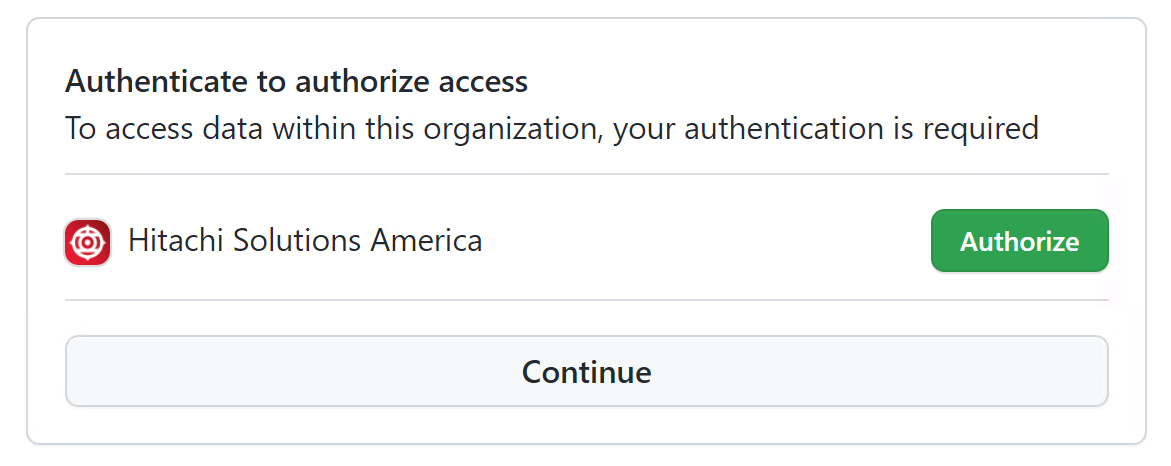
-
The repository should now be cloned. Now we need to open it in PyCharm and install the projects dependencies.
Installing dependencies with poetry
-
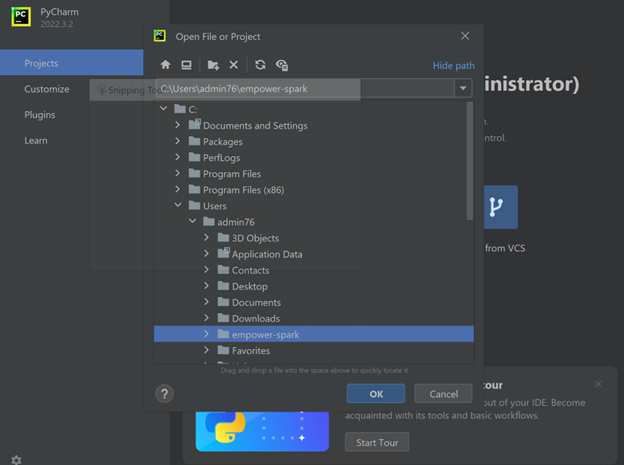
After installing the tools and pulling the repo, open the project in PyCharm.
-
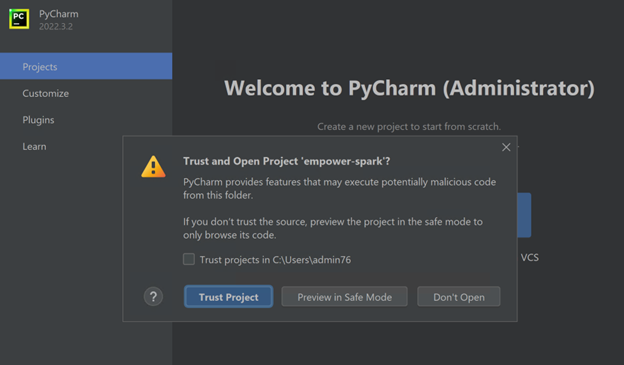
This specific folder you should open varies on what part of the program you are working on. After opening the folder tell PyCharm to trust the project.
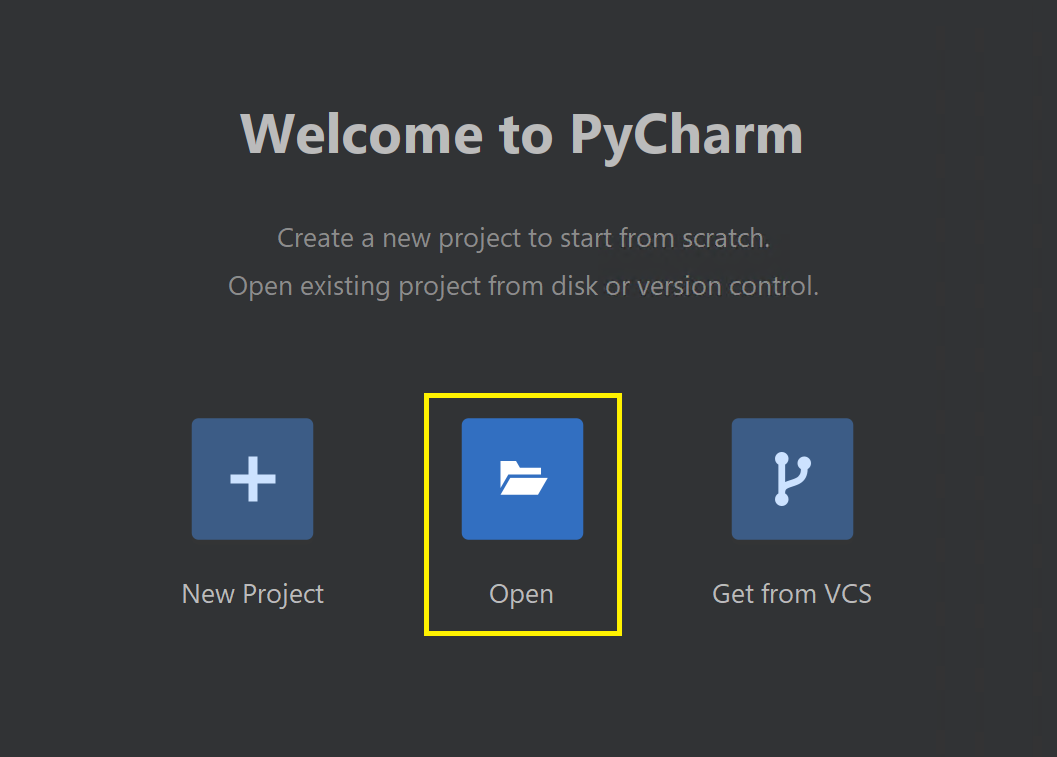
-
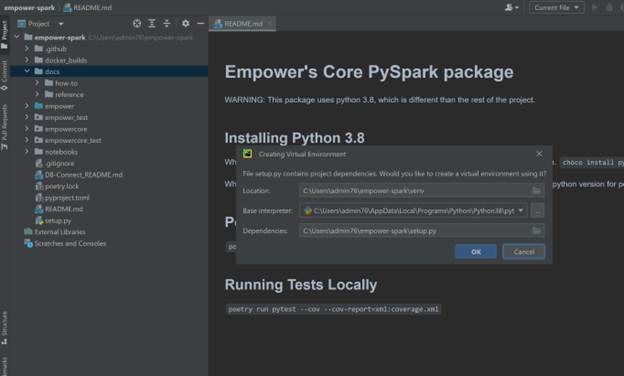
When prompted, create the virtual environment with the default values:
-
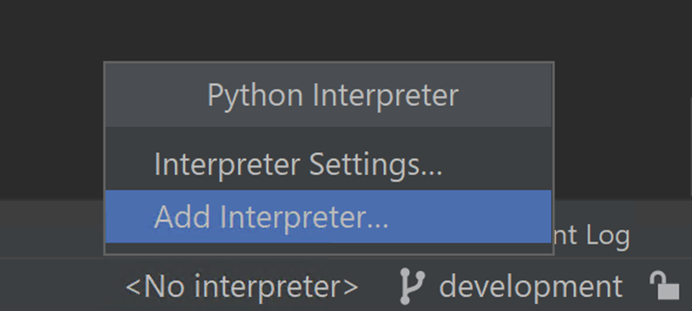
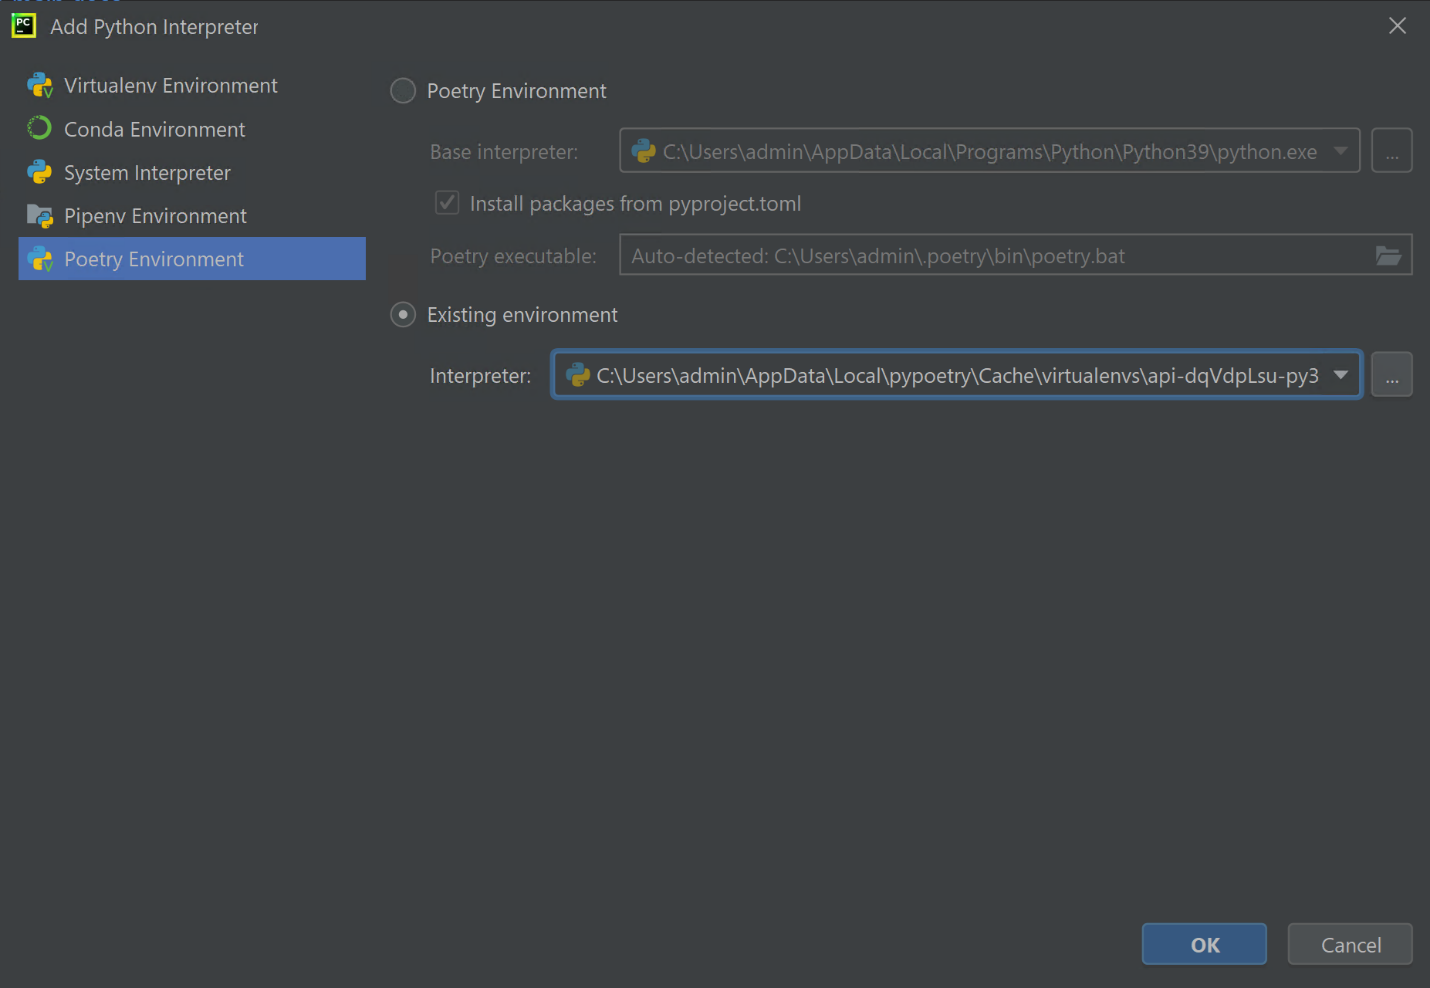
Now add an interpreter to your PyCharm environment. Adding an interpreter can be found at the bottom right-hand side of the IDE.
-
Select Poetry Environment and Existing Environment. The name will be the virtual env at the top of the poetry install command output.
Note: Add Interpreter step can be skipped if there is only one python version installed which is 3.8.10 and it is already associated with pycharm as the default python interpreter.
-
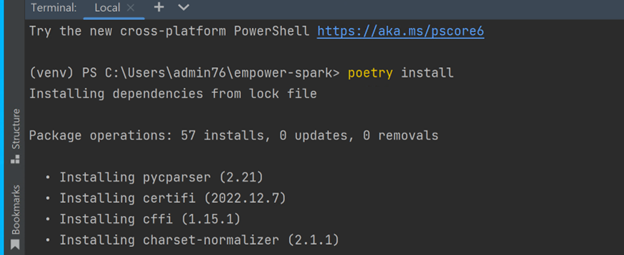
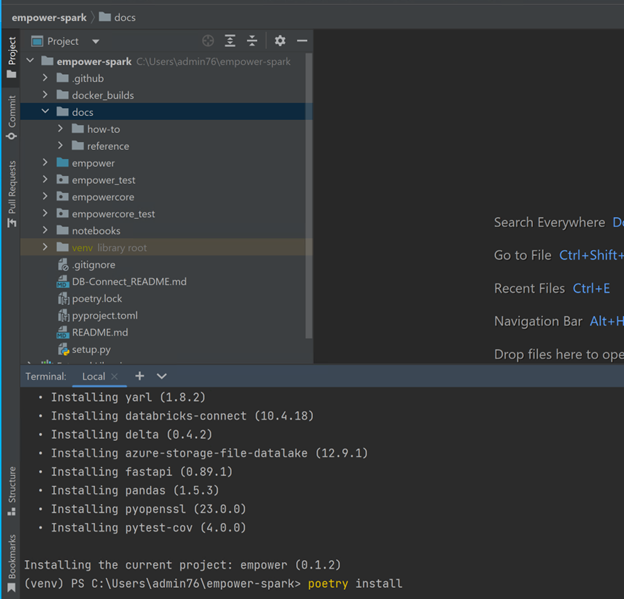
At the bottom of the IDE, open the PyCharm terminal and run the command "poetry install”. This will install the current dependencies for the empower spark or whichever part of Empower you have open.
-
You now have all the tools you need to start development.